Essential WordPress Setup Steps After You Install WordPress
Just launched your WordPress site? Congratulations! After taking a few moments to bask in the glow of your shiny new website, we recommend a number of important WordPress setup steps which will prime your site for success and save you some headaches down the line.
From protecting your website’s security to stopping spambots in their tracks, we’ve compiled a list of essential setup tasks below for anyone beginning with WordPress.
Already a WordPress aficionado? No worries! Though they’ll have the largest impact if implemented from the get-go, you can still benefit from these setup tasks, too!

1. Setup your comments
How much control do you want over comments on your site? What sort of information should commentators include before they can post? When should you be notified of a new comment?
WordPress offers lots of options to configure your site’s comment experience just as you’d like it. But because adjusting your comment settings will only apply them to new or future posts and pages (and not retroactively to those you’ve already published), you’ll want to setup your comment settings as soon as possible.
Navigate to WP Dashboard > Settings > Discussion.
Here, you can setup the comment experience you want for your site visitors and yourself. There are lots of options and many are quite straight-forward. If you want an explanation of particular options, check out the WordPress Codex’s Settings Discussion Screen.
Here’s what we recommend configuring and why:
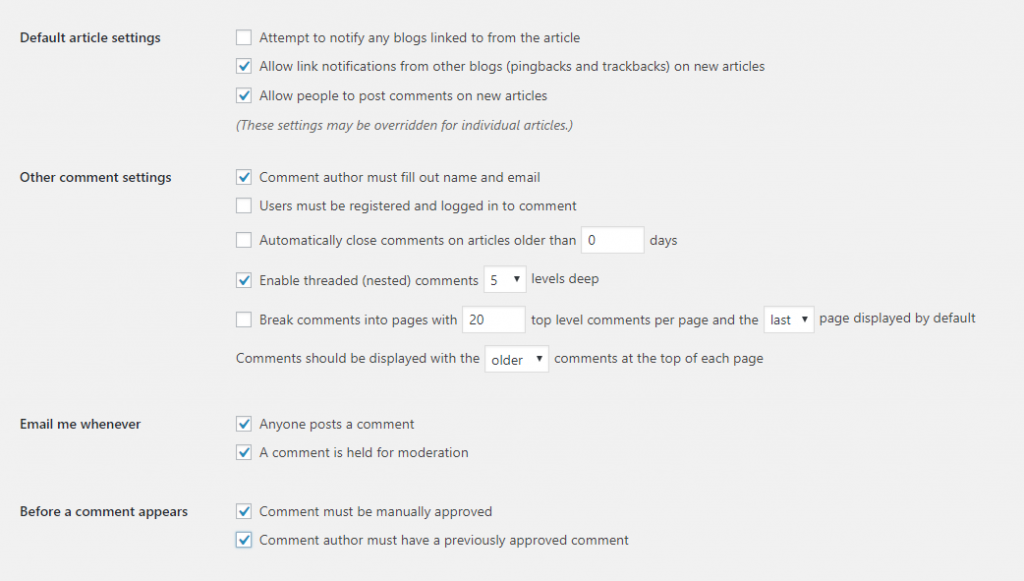
Default article settings
- Allow link notifications from other blogs (pingbacks and trackbacks) on new articles: Want to know when someone links to your post on their own site? If they have their pingback & trackback setting enabled, you’ll receive a comment notification on your post when someone’s linking to it.
- Allow people to post comments on new articles: This is the general setting to open comments on your new posts and pages so that visitors can post their thoughts.
Other comment settings
- Comment author must fill out name and email: Comment spam is a major issue. Make it a little harder for the bots by requiring a name and email address before anyone can submit a comment. While they’ll still be able to submit even if the email isn’t a valid one, this step will weed out quite a few spammers and the “Akismet” plugin noted further on in this article will screen most of the remaining annoying bots.
- Enable threaded (nested) comments 5 levels deep: When you or another visitor replies to a comment, the reply will appear nested or indented. Allowing multiple levels of nesting will make reading comments more easy. You can change the numerical value here to whatever you prefer.
Email me whenever
- Anyone posts a comment: You’ll receive an email notification when a comment is posted.
- A comment is held for moderation: You’ll receive an email notification when someone attempts to post a comment. The comment will be held (not publicly posted) until you manually approve or deny it.
Before a comment appears
- Comment must be manually approved: When someone attempts to post a comment, it will be held until you manually approve or deny it. Until it is approved, the comment will not be posted publicly.
- Comment author must have a previously approved comment: If a person has commented on one of your posts and you approve it, any future comments submitted by that same person will be automatically approved. For visitors who frequently engage with your posts, this can reduce your time spent moderating comments manually.
This is all great for new posts, but what about my legacy posts?
Now that you’ve setup your comment settings for all new posts, what about those that have already been published? Is it too late to adjust them? Not at all! You can enable or disable comments on legacy posts using the WordPress bulk editor tool.
Navigate to your Posts screen where all posts are listed. Check the boxes for the posts you’d like to enable/disable comments on and, in the “Bulk Actions” toolbar drop-down menu, select the “Edit” option. Click the Apply button. In the bulk editor interface that appears, choose to Allow or Do not allow for the “Comments” and “Pings” options. Click the Update button when finished.

As for comments which have already been submitted, you’ll likely need to muddle through the approval or trash process via WP Dashboard > Comments on these, but from now on it’ll be smooth sailing!

2. Plugins, plugins, plugins
One of the best aspects of WordPress are plugins. These are attachments you can install onto your WordPress to add extra features and functionality to your website. Like themes, some are free and some cost money. However there are loads of free plugins which are wildly helpful.
Here are some of our favorite plugins and why you should install them right away:
AKISMET PLUGIN
No one likes comment spam. Akismet is a lightweight plugin that checks your post comments against its continually-growing massive database of known spam. If it flags a comment as known spam, it automatically trashes it. Bye-bye pesky robo-comments!
SEO PLUGIN
SEO (Search Engine Optimization) is a term you’ll hear thrown around A LOT these days. It refers to steps taken to help increase a website’s probability of being ranked highly in search results on major search engines. A higher search result ranking equals more traffic to your site. Yoast SEO is a popular tool that helps make navigating the intimidating world of SEO way more easy.
CACHE PLUGIN
A cache plugin will generate and store static HTML files for your WordPress site. This can dramatically reduce load time. There are numerous reputable cache plugins available for free. We recommend “WP Super Cache” which is a WordPress perennial favorite with over 2 million active installations!
SECURITY PLUGIN
The world wide web is fraught with malware and threats of hacks. Protect your website (and save yourself potential headaches and heartbreak!) with a security plugin that will help recognize and block any unwanted intrusions. The popular “Wordfence Security” plugin has over 3 million active installations and an admirable 5 star rating on the WordPress Plugin Directory.
PERFORMANCE PLUGIN
Every time a web page is loaded, there are loads of scripts being loaded secretly in the background, one after the other. Again and again with each page your visitor navigates to. This can cause strain on your server and decrease load speed. Autoptimize will link together the various scripts, minify them, and compress them as well as other helpful tricks to help optimize your page’s load speed. Autoptimize even recommends complimenting its tools with a cache plugin such as WP Super Cache for the best results.
IMAGE OPTIMIZATION PLUGIN
Images are “heavy” to load and, if your site has or will have lots of images, you’ll want a tool that helps lessen the loading stress on your server. Load stress = slower loading speeds and no one likes that. EWWW Image Optimizer compresses legacy and future images (while maintaining quality) to keep your pages loading in a speedy manner.

3. Add Google Analytics to your site
Everyone uses Google Analytics these days and for good reason! Google Analytics allows you to track all kinds of variables regarding your site traffic such as “Where are visitors coming from?”, “How long do visitors stay on your site?”, and “When are visitors visiting?”
Understanding your website traffic statistics is crucial for growing your visitor base and knowing how to best optimize your site for further growth down the road.
Getting started is simple! Just sign up for an account, generate a tracking code, and then add the code to your site. After that, sit back and monitor all the exciting ways visitors interact with your site!
You can check out our step-by-step guide for adding Google Analytics to your website here: How to add Google Analytics to your WordPress Site
![]()
4. Setup your WP User details
When you publish a post, your username will appear to attribute you as the author. Additionally, many WordPress themes may include an “Author Box” element which features your username, your WP User bio, and an avatar image. If left unfinished, visitors may see a fallback avatar image, an empty bio, and a post written by someone named “Admin”. Not very exciting nor professional.
Choose a display name
Navigate to WP Dashboard > Users > and select your user to edit it.
In the “Name” section, you can choose what name will be shown on posts or in comments.

While you can’t change your actual WordPress Username, you can add a “Nickname” that’s different than the WP Username. Then, from the “Display name publicly as” drop-down menu, select your “Nickname” you created. This is the name that visitors will see on your website.
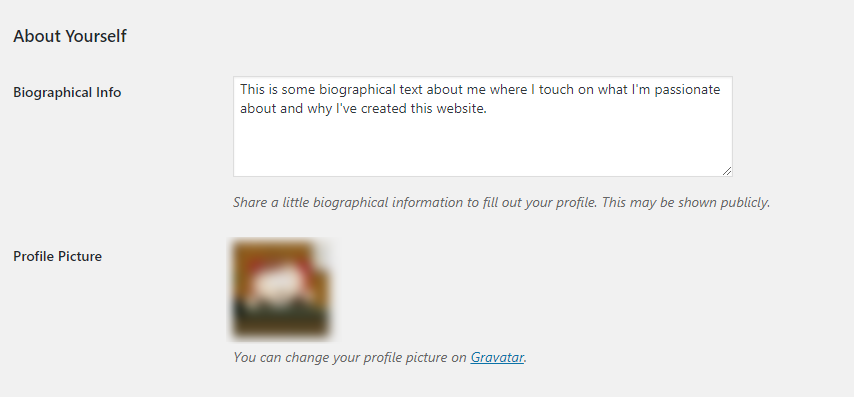
Setup your User avatar
WordPress uses the Gravatar profile picture hosting service. Simply create a Gravatar account, upload your desired profile image, and use the same email address associated with your WP User. Your chosen image will represent you within your Author Bio and in comments.
Setup your User bio details
Lastly, make your posts more personal by adding some biographical details about yourself within the “About Yourself” section. What is your passion? Where are you from? What would you like your readers to know about you?
. . . . .
While these are the few critical WordPress setup steps we recommend taking as soon as you can after installing the platform, there are lots of other tips and tricks for getting your WordPress website in tip-top shape.
For even more ways to enhance and optimize your blog like a pro, check out our other guides below!
Additional resources to optimize your blog
How to add Google Analytics to your WordPress Site: Learn valuable information about your site traffic with Google’s free Analytics service.
Solo Pine WordPress Blog Themes: Interested in refreshing your blog? Check out our latest and greatest WordPress themes!
Awesome flaticons courtesy of Smashicons, Freepik, and Vectors Market


